Showing posts with label literacy. Show all posts

Wednesday, April 27, 2022

Día Craft: Make Your Own Family Keepsake Book


This week, we continue our series on Día inspired crafts. These are literacy-based crafts that kids can put together. And these are fun activities that promote a reading culture at home. Today's craft comes from guest contributor and artist Denise Cortes, who originally wrote this for L4LL. If you enjoy this tutorial, check out her other one: DIY Book-Inspired Sports ID Tag.

We hope your children enjoy this tutorial for making their own DIY family keepsake. 

This post contains affiliate links.

Día de los Niños Craft: Bookmaking


My kids are really sentimental when it comes to family photos. One of our favorite things to do as a family is to thumb through their baby books and photo albums. We all laugh at the memories and by the end, I’m usually in tears. Why must childhood be so fleeting?

I wanted to teach my daughters how to make a DIY family keepsake book so they could collect photos, small notes and drawings, keeping alive the tradition of documenting our family.

This craft project is inexpensive and fun for everyone! 

Materials:


Directions:

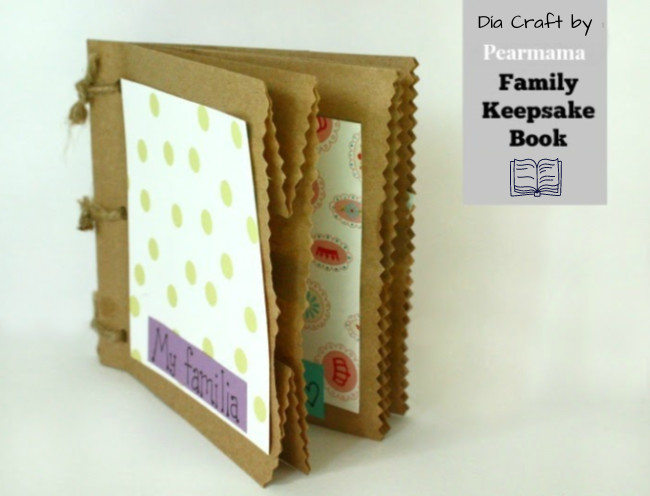
What I love most about this project is we’re repurposing an inexpensive brown paper bag. It’s as simple as folding a bag or two in half, sandwiching them together, poking a few holes on one side and threading a piece of twine or ribbon to bind them together. After trimming one side with a pair of decorative edge scissors, you will have a “book” with pockets, similar to an accordion.
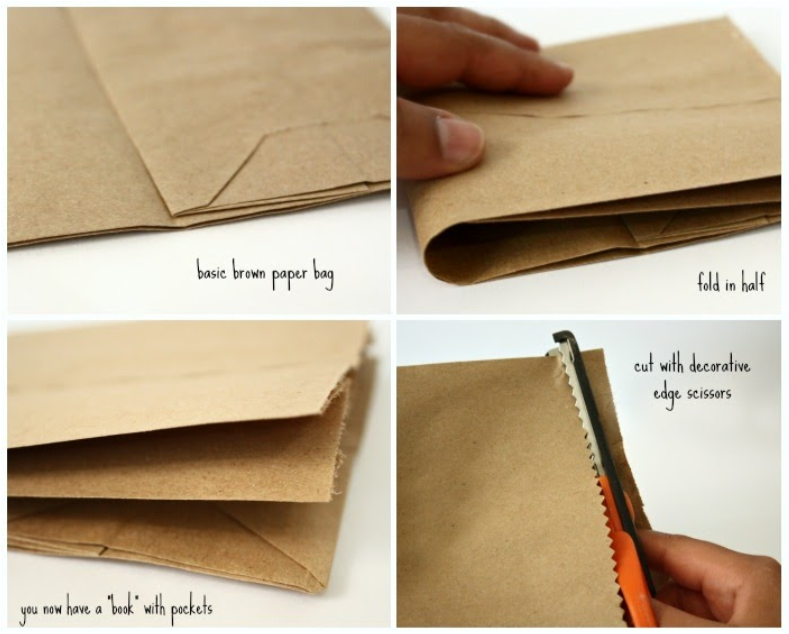


If you want to make the “book” thicker, use more than one paper bag. I used two, which allow me to have four pockets for sliding in photos and keepsakes.


To bind the paper bags together, make three holes along the edge that is opposite to the opening side.


Now you are ready to decorate your book. Find a few patterned sheets of scrapbooking squares. Cut them down to size so they can fit properly.


Glue down each piece of scrapbooking paper onto the “pages” of your book. Add a smaller piece of solid color paper and glue it on top of the scrapbooking paper, toward the bottom. This space is for any captions such as: My Family, Mama, Papa, Brother, Sister, Abuelita, etc. Remember, you are celebrating family!


The final step is to thread the book with a piece of jute twine, to bind all of the pages together. Be sure to tie a tight knot.


Now you can fill up your keepsake book with pictures, notes, and photo booth pictures!


Monday, April 25, 2022

Reading Challenge & Passport

 Bilingual Reading Passport

This week, I'm continuing our Día de los niños series with a free download. If you're a MommyMaestra subscriber, you'll find this printable reading passport in your inbox this evening. If not, you can purchase my reading passport file in my TpT store. 

Scroll down to the bottom of this post or sign up here for my newsletter.


Bilingual Printable Reading Passport

This reading passport is easy to print and assemble.  

  1. Make sure to select "Actual Size" on your printer settings, or "Custom" and "100%."

  2. Print pages 3 and 4 on two separate pieces of paper (Do not select "Print on both sides of paper.")

  3. Fold page 3 in half with the printed side facing out. 

  4. Fold the page in half again with the dark blue covers on the outside.

  5. Repeat steps 3 and 4 with page 4.

  6. Tuck page 4 inside page 3. 

  7. Staple in the middle to hold the booklet together.
The passport has text in both Spanish and English.


How to Use This Reading Passport

You can use the reading passport like a reading log for your child. Just let them enter the titles and authors of the books they've read and keep it like a running account. There is no limit to the number of inner pages you can print and add to your child's passport.

OR you can assign your child a reading challenge...

Latino kid lit


Reading Challenge

I'm always thinking about ways to get kids excited about reading. And one of those is with a reading challenge. 

One simple and easy challenge is to have your kids read 8 books in one month. You can set the details based on your child's interests and reading level (picture books, chapter books, poetry, etc.), or just let them choose which books they want to read.

Other challenges could be for the summer or school year. You can require books by Latino authors, classics, novels, short stories, books in Spanish, biographies, or even graphic novels. You can also challenge your student to read one book from each genre.

Whatever you do, be flexible and have fun!


Other Día Posts You May Enjoy:


Subscribe to my newsletter for free downloads!

* indicates required

Friday, April 22, 2022

Día Craft: Music-Themed Magazine Holder


Here is another fun craft that nurtures a reading culture in your home. Today's tutorial comes from guest contributor Dariela Cruz of MamiTalks, who originally wrote this for L4LL. 

Magazine holders are so useful. I never think of them for the kids’ room, but even if the kids don’t have any magazines, they always have coloring books, reading workbooks, math workbooks, or notebooks that can definitely be organized better inside a magazine rack.

This post contains affiliate links.

Día de los Niños Craft: Themed Magazine Holder


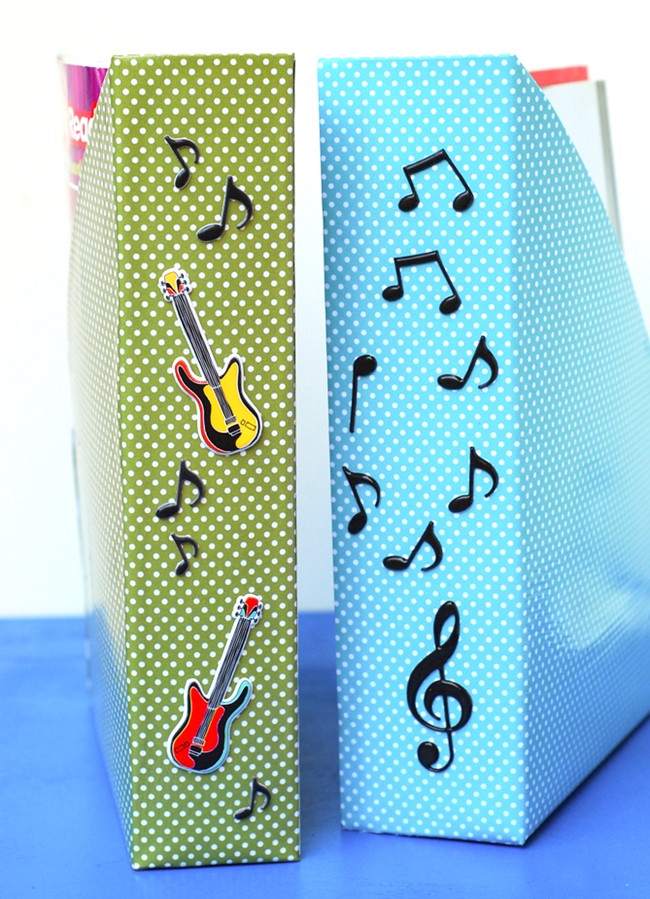
This magazine rack is made out of a cereal box, some scrapbooking paper, and stickers. It is very easy to make and the kids can help, too. 

This one has a musical theme and can be very useful for storing sheet music and/or music notebooks. But let your child choose the theme that appeals to them the most. There are many wonderful designs of scrapbooking paper available for each kid’s preference. 

Guide them through this craft and they will love making something useful for their own room!


Supplies:


Instructions:


Grab the empty box of cereal and place a magazine on top of it.

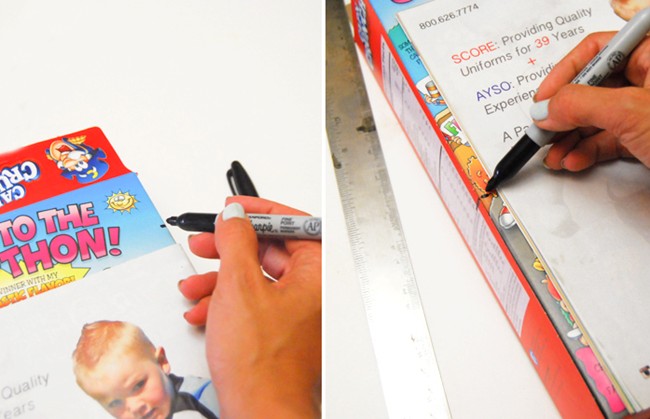
Make marks with the permanent marker on one side of the box a little bit higher than the magazine height and on the other side make a mark a little bit lower than the half of the magazine’s total height.


Draw a line joining both marks then continue on the other side with the help of a ruler.


Carefully cut the box with scissors (or with a craft knife) along the marked lines.


The structure of the magazine holder is done. Now to decorate it!


Use the first scrapbooking paper and lay the box on top of it. NOTE: it will cover only two sides of the box. 

With a pencil mark the paper leaving space for flaps on every side and the top and bottom, they don't need to be precise, just make sure you have them all, then cut along your marks with scissors.


Once the paper is cut, apply the glue with a brush to all its areas.


Glue the paper around the two sides of the box.

Mark, cut, and glue the second scrapbooking paper the same way as the first but don’t leave flaps on 2 sides so that the border of the paper is exactly aligned with the edge of the box.


Once the whole magazine holder is wrapped with paper, apply the decoupage glue all over it and let it dry for a couple of hours.


Cut a small rectangle of scrapbooking paper and place it on the inside of the back of the magazine holder. This part will show even when the magazines are inside.

OPTIONAL: You may want to cover all of the inner sides and spine.


Now, it’s time for the fun part! 

Let the kids use the stickers and have fun decorating the magazine holder! Use them on the thin sides of the holder, which are the ones that will show more often when it’s in use.


Books that Celebrate Music:


Other Posts You May Enjoy:


Monday, April 18, 2022

Día Craft: DIY Book-Inspired Sports ID Tag


Día de los niños, Día de los libros is quickly approaching. And one of the requests we've received from our readers is for more Día inspired crafts. So that will be the focus of our next several posts. Today's craft comes from guest contributor and artist Denise Cortes, who originally wrote this for L4LL. 

Día is about celebrating children and books, as well as inspiring literacy. We hope you enjoy this tutorial for a DIY book-inspired sports ID tag. Be sure to scroll down for a list of sports-themed picture books that your children may also love!

This post contains affiliate links.

Día de los Niños Craft Idea


With this cool ID tag on your soccer (or baseball or football) bag, you can easily spot it amongst your teammates’. It also showcases your love of reading and soccer (or whatever sport you play).


Materials:


- scissors
- hole punch
- loose leaf binder ring (we also like these binder rings for a splash of color)
- cardboard
- scrapbooking paper 
- black marker


Directions:


Whenever I am crafting, I really try to utilize my resources. Instead of going out and buying a thick piece of cardstock, I used a piece of cardboard. I just cut it down to the size I wanted my ID tag, which was 3 x 3 inches. 

I also cut a circle so I could make a soccer ball shape. On the white paper, draw a soccer ball, making sure its the same size as the cardboard circle. Color it in with the Sharpie marker and then cut it out.


Glue the soccer ball drawing onto the round cardboard shape. Also, glue the blue scrapbooking paper onto the cardboard as well. 

You can use a glue stick, but for this particular project, I prefer Mod Podge. Not only will it glue my shapes together, it will seal the surface and make the ID tag a bit more sturdy. 

This means you’ll need a coat under your paper to glue it down to the surface as well as a coat brushed on top to act as a sealer. Once that coat is dry, you can add little details on your “book” with a black marker.


My son’s team was called “The Transformers” and the team color was blue, so I kept to a blue palette. I also cut out a few triangles to give it a fun, modern look. Glue them down with another coat of Mod Podge. Doodling a few fun designs would look great on your ID tag, too.


Once it’s completely dry, make a hole in the corner of each shape using the hole punch. Pull the shapes onto the loose leaf binder ring.

Be sure to flip the ID tag over and write down your information, just in case your bag gets lost. Your book-inspired sports ID tag is now ready to be displayed on a sports bag or backpack! 


Sports-Themed Books for Día


We recommend these picture books for sports lovers:


And be sure to check out this book written especially for celebrating Día!


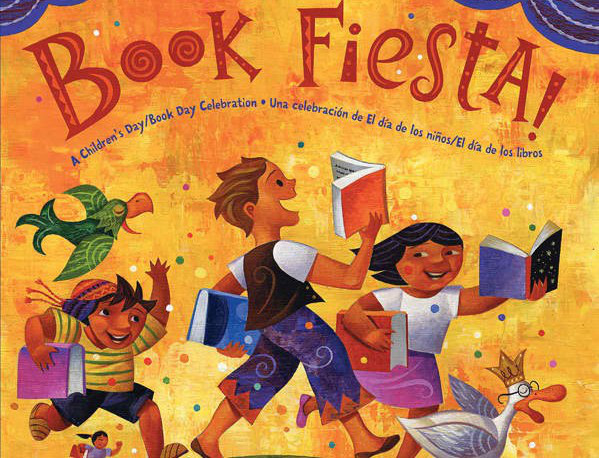
Book Fiesta! by Pat Mora

Other Posts You May Enjoy


Tuesday, March 15, 2022

St. Patrick's Day Mini Vocabulary Puzzles


It seems as though St. Patrick's Day sneaks up on me EVERY single year. But I still had time to come up with a free printable activity! This set of St. Patrick's Day Mini Puzzles is headed into the inboxes of all my newsletter subscribers by Wednesday morning. You'll also be able to buy it in my TpT store. 

This year's download is designed to help young students boost their vocabulary while practicing their reading skills.

With this print-and-go activity, all they have to do is cut out the puzzle pieces in the Answer Box and then match them to the image that depicts their word. All the words are related to St. Patrick's Day.

And you can choose to give them the full-color version, or add more time to the activity by having them color in the images first. And, yes, they are available in both English and Spanish. Just choose which version works best for you.

If you'd like to get a copy, scroll to the bottom of this post and be sure to subscribe to my newsletter below. It'll be going out Tuesday evening and Wednesday morning. 


Other St. Patrick's Day Posts You May Enjoy

Hey! Consider getting one of my other printable activity sets dedicated to this holiday. There's something for kids of different ages, including a Preschool - Kindergarten Activity Pack, a Book of Words to color and practice writing skills, and finally a Brief History of Los San Patricios for older students. Read more about them here.


Subscribe to my newsletter for free downloads!

* indicates required

Tuesday, August 18, 2020

Martín y Pepe - Spanish Beginning Reader Books


Friends, I'm excited about today's giveaway! (I know, I'm excited about ALL of them!) But this one is special to me because this series of books is loved by my 3yo. 

Last year, I shared these books with you in a sponsored post. Not only did I fall in love with the simple storylines and the beautiful illustrations, but so did my youngest. 

THEN, when I was hosting the Migrant Children's Book Drive last year, Dana Ryan - the author of this series - reached out to me and donated 40 copies (10 of each book). Y'all, I just really love this series and both the author and the illustrator. 

Rosa C. Lopez is the artist. She's brilliant. I actually had her create some art for me for a current project I'm working on and it was remarkable the choices she gave me. I had such a hard time narrowing it down and had to ask my own children to help me choose. And they had a hard time, too. Rosa is THAT good. 

Here's a time-lapse video of her working on the most recent book released in this series. Watch her brilliance in action... 


The Giveaway

Dana has SO kindly offered to give away one complete set of these beginning readers to one MommyMaestra reader! 

To enter, simply use the Rafflecopter below. 

Good luck, friends!

a Rafflecopter giveaway

Monday, August 17, 2020

Nacho Books


One of the things that I see coming up a LOT these days from parents raising bilingual children is a request for materials that teach children how to read in Spanish. Especially from parents who had children in immersion PreK and are now homeschooling them for Kindergarten.

A few years ago, I reviewed the Nacho (lectura) books from Susaeta. They have been SO POPULAR! So many parents have said that these were the books they used to learn to read. 

But the biggest hangup was that they are published in Latin America. Fortunately, there is one place here in the States where you can order them: Cultural Bytes. 

The Giveaway


But I'm very happy to announce that our friends at Cultural Bytes are offering a set of these awesome books for one lucky family.

This set includes (all shown above):
1- Nacho Lectura Inicial De Lectura (estados unidos)
1- Leo y Escribo 1
1- El Gran Nacho

To enter to win, simply use the Rafflecopter below.

¡Buena suerte!

a Rafflecopter giveaway

Thursday, August 13, 2020

Act It Out Shakespeare

Today, I have the pleasure of a special feature. 

There's no giveaway associated with this because the creator is using the profits from her sales to pay for her ballet class. She's 12 years old. 

Julie Cerdas is a member of our Hispanic & Bilingual Homeschoolers Facebook group. Her family homeschools. A few years ago, while studying King Lear with another family, they tried to find paper puppets to supplement their lessons and make it a little more interactive for the kids. But they couldn't find any. Her daughter was inspired to create her own, and then, Act It Out Shakespeare was born. 


Her daughter has created a website to seller her creations. It's called Bluebirds and Blackberries Studio. That's where you can find this set for Shakespeare's The Tempest. But she didn't stop with just puppets. She also adapted the play to include only the characters for which there are puppets, but still presents the complete story arc of the play. So in all, her digital set comes ready for download with 11 puppets to cut out and glue to popsicle sticks (if desired), a play, and a list of characters per scene so you can easily assign roles without going through the entire play.

She's also created a set for A Midsummer’s Night Dream and is working on Much Ado About Nothing. I love that she's made the former available in different versions: full-color or outlines to allow children to color their own should they so choose. 

Children are amazing. Their creativity knows no limits. And parents who nurture not only their child's creativity but their entrepreneurial spirit deserve praise. 

So if you are studying Shakespeare in your home or school classroom and would like to buy a set, visit their online shop. 

Well done, young one!


Other Posts You May Enjoy


Wednesday, April 29, 2020

Día Craft: DIY Book Tutorial

The following tutorial is contributed by Lisa Renata. It originally ran on the Latin Baby Book Club.

Reading is a daily thing in our home, as is recycling and creating. So when I was asked if I could put a tutorial together on how to create your own bilingual book, I was ecstatic. I then gathered the materials (and kids) needed to start our project. This is what we came up with.


Nothing fancy. It is made by children after all, but isn't that what makes it that much more special? The older the child gets the more intricate the work, details, and writing will be.

Make Your Book:


Creating a book is a lot easier than it looks. It is also a perfect and a fun way for your little one to practice reading in both languages (or one).


What you'll need:


• an empty cereal box
• 5 sheets of white printer paper
• sewing machine and thread (other options available)
• markers, crayons, colored pencils
• stamps and ink

Steps:


First, cut out the larger part of your cereal box. This will be your book cover.


Then use it as a template to size and crop your 5 sheets of white paper. You want the white paper to be slightly smaller than the cover.


Fold your cover and paper (at the same time) in half. Then if you have a clip available, clip one of the ends together. This will help hold all the sheets and cover in place while you sew a line across the center. Use the fold line as your guide.

If you don't have a sewing machine other options to bind your book can be: stapling the center together, or hole-punch about four holes on the edge of the fold and then run ribbon or yarn through the holes. Make sure to knot the ends.


Write Your Story:


Now it is time to write your story! What to write? Well, that will depend on the age of your child and what their interests are at the time. In our case, my five-year-old son is really into animals right now. So we decided to make a book about animals.


First, I wrote out the title and by-line page.

Because he is still learning to read in both English and Spanish, I decided to do the writing for him. I wrote simple three-word sentences. I chose black ink for the words in Spanish and blue ink for those in English.


Then he drew a picture that went along with each sentence.


For my three-year-old daughter, I wrote one word per page, both in English and in Spanish (also using different colors per language) and drew the pictures for her. All she had to do was color them in.

Once the inside of the book was completed, we then decorated the cover with stamps. How much supervision you need with each child will also depend on their age. I allowed my son free range on how he wanted his front cover decorated, but my daughter, on the other hand, needed my help.

Again, the older your child is the more detailed his/her book will be and the less involved you will be in the book-making process (in fact, if your child can sew, you can let him/her bind the book). If your child does not know what to write about, give him/her some topic ideas. The important thing is to encourage creativity in both their writing and art.

Book cover finished? Then you are done!


Have fun together reading your child's creation over and over again!

-------------------------------


Lisa Renata is a US-born Latina who experienced Mexican culture first-hand when she lived there as a child. Lisa is a book lover, a mama raising her two kids bilingual, and a crafter.. with a camera always in her hands. You can often find her interpreting and testing for the local school district ESOL program or making new items for her Etsy shop SaborCajeta.

LinkWithin

Related Posts Plugin for WordPress, Blogger...